


Having makeup knowledge is all about knowing what the right things for you and how to apply them to get the best out of your face. Contouring is an important part of makeup. But, face makeup contouring can be really tough if you do not know the application. Face contouring for beginners can also be difficult, but by following some step by step procedure for contouring face, you can bring about a huge change in your face. Actually, without proper contouring knowledge, you can never be a better makeup artist. Have you ever seen a huge face to turn into a thinner one? Well, you will know about it once you know about contouring. Let’s see how to contour your face with your own product at home and without the help of a makeup artist:
Step one: Choosing the right products for your skin.

Source: Pinterest
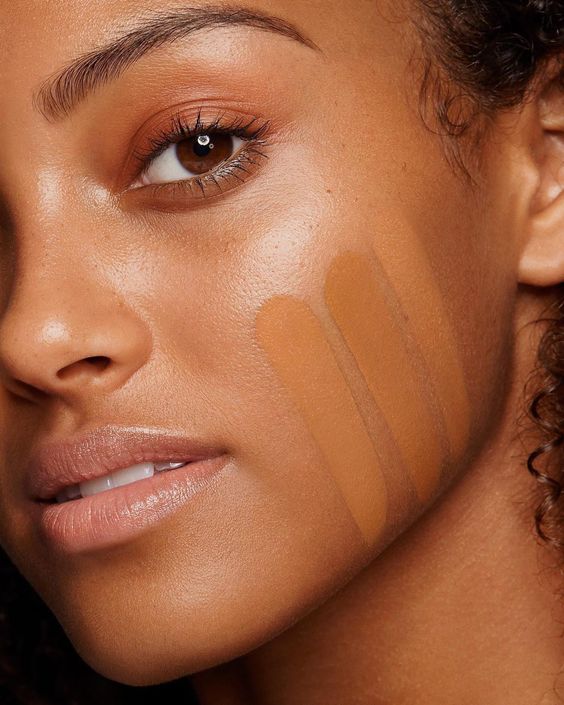
It is suggested that buy foundation that is equal to your skin tone. You can test the foundation by applying a little amount in your hand or neck. Once you have chosen your foundation tone, chose a contour palette and a tone darker than skin tone. It is recommended to choose two shade darker contouring palette to contour face makeup. Never go for contouring with a much darker shade. It should always be one or two shades down. According to your preference, choose matte or creamy contouring palette to have a natural look. Matte products are best for oily skin.
Step two: Know your face shape

Source: Pinterest
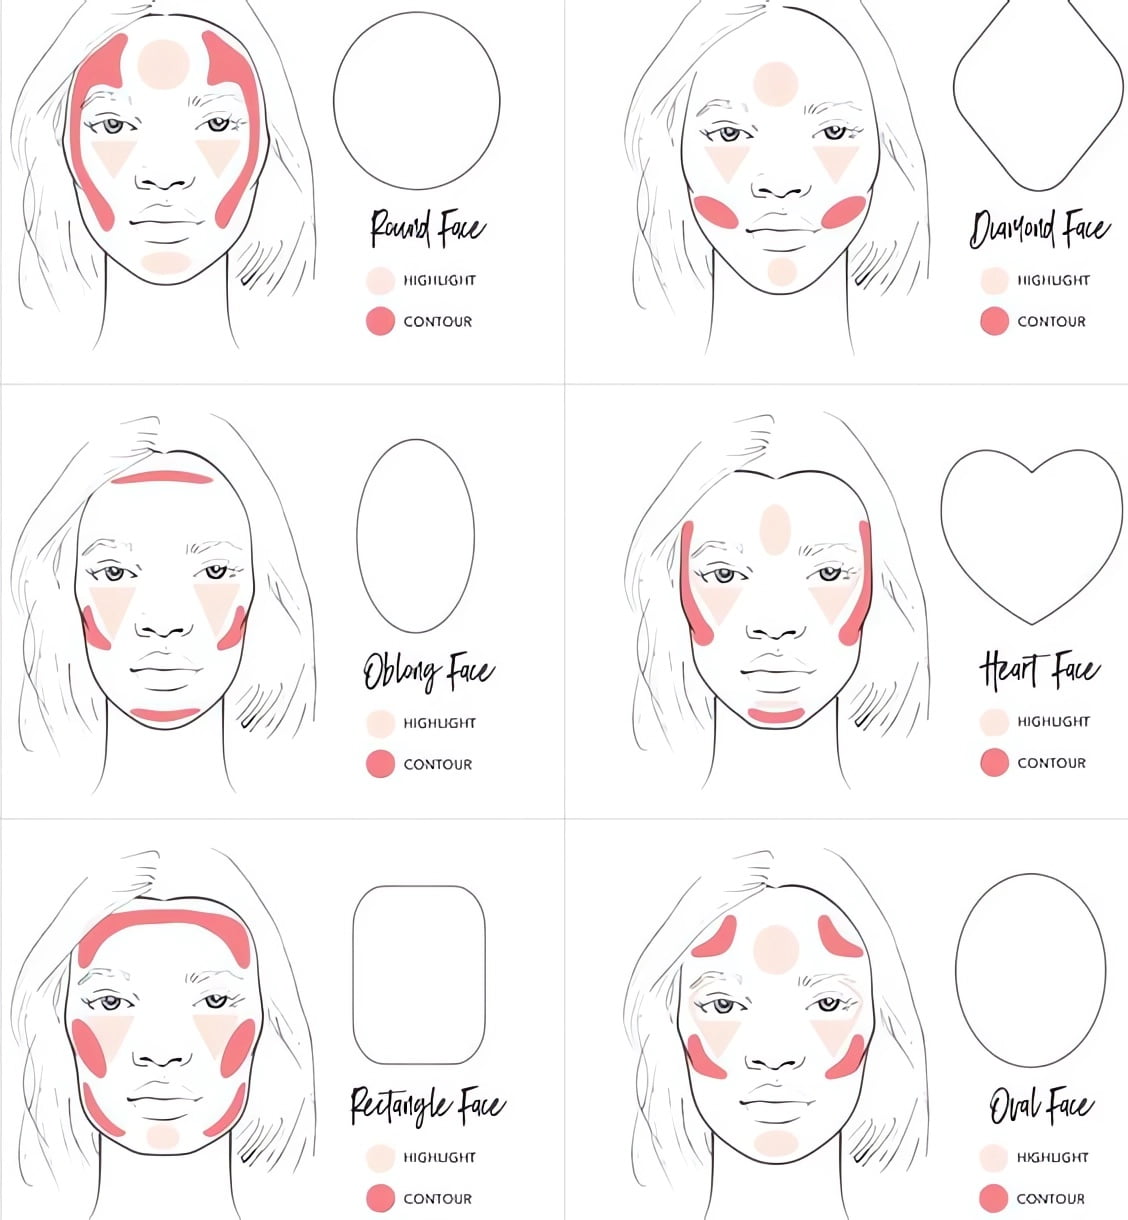
After choosing the right product, now you need to know what type of shape your face belongs to. It is known as mapping of the face. There are so many things to find out about your face. Do you have a short length nose? Then apply contour from the brow to make it look a little longer. Do you have a puffy face? You can apply shades into the hollow portion below the cheek bones to make it thinner. Apply them on the forehead as well.
Step three: Choose the appropriate blending brush

Source: Pinterest
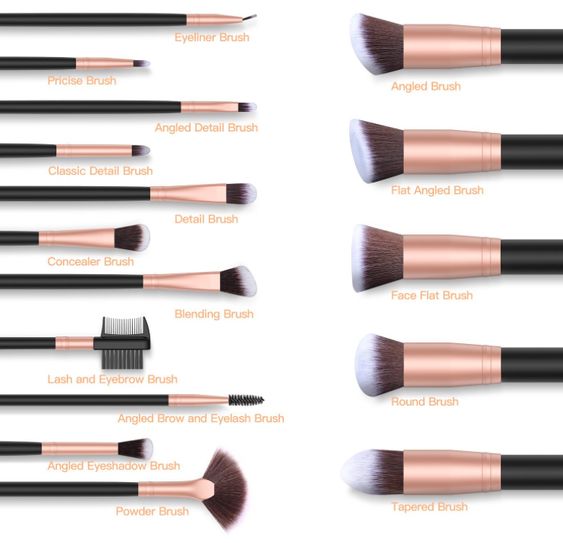
You can apply them with your finger or brush. Fingers are good blender, but they are never oil free. A good blending brush can work like magic. There are different brands out there with so many contouring brushes to blend your contour shades. Choosing a beauty blender can be a smart option as well.
Step Four: Blending

Source: Pinterest
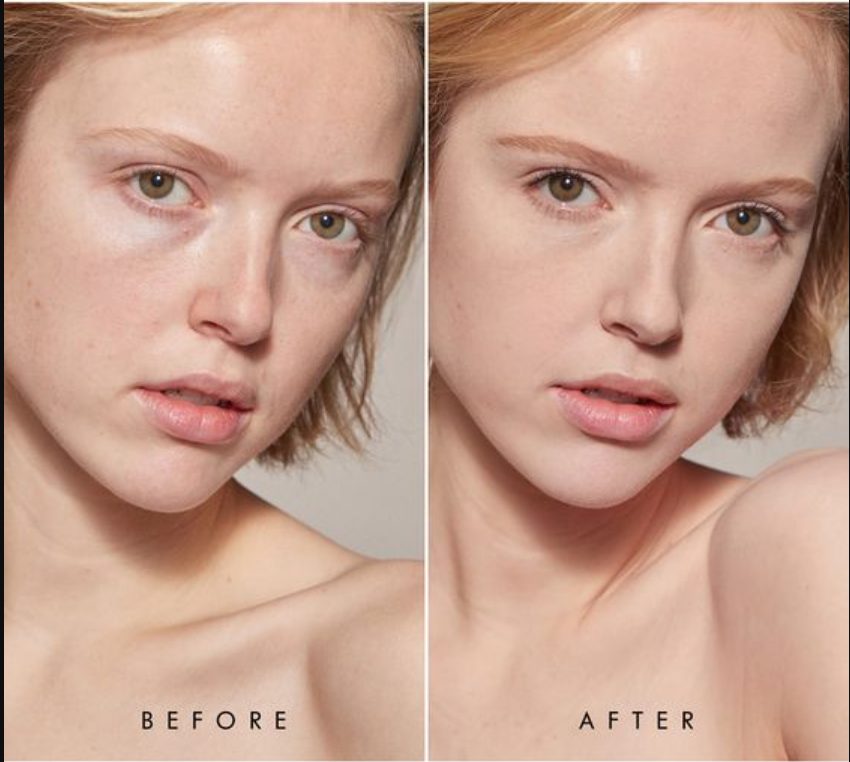
This step includes easy, but at the same time most important step of the whole procedure. It is called blending. Blend it properly so that you can look natural and the shades matches your skin naturally. According to the experts, blending should not be a stretched process, rather you just tab the blender randomly on your face. So, here you get the glossy cheek bones you wanted after proper contouring and highlighting. Contouring and Highlighting are inseparable steps.